今天來說明我們想要一台擁有 LAMP 的機器要怎麼讓 CDK 幫我們自動部署起來吧!

建立 HTTP Server
寫安裝腳本檔
要建立 HTTP Server 首先需要先準備一個安裝腳本,而這個腳本需要請 User Data 幫我們跑執行指令
先建立一個資料夾 ec2-config 在裡面新增一個檔案 configure.sh,先對腳本做一個說明
- 第三行:更新 yum
- 第四行:安裝 LAMP
- 第五行:安裝 Apache 與 maria DB
- 第六行:啟動 Apache
- 第七行:設定開機啟動 Apache
- 第八行:把 ec2-user 加入 apache 群組
- 第九行:設定 /var/www 目錄擁有者
- 第十行:設定 /var/www 目錄權限
- 第十一行:設定所有資料夾目錄權限
- 第十二行:設定所有檔案權限
- 第十三行:設定 phpinfo 檔案
以功能來看此腳本做了
- 更新機器
- 安裝必要程式
- 設定檔案目錄權限
- 新增一個 phpinfo.php 網頁
#!/bin/bash
uname -a
yum update -y
amazon-linux-extras install -y lamp-mariadb10.2-php7.2 php7.2
yum install -y httpd mariadb-server
systemctl start httpd
systemctl enable httpd
usermod -a -G apache ec2-user
chown -R ec2-user:apache /var/www
chmod 2775 /var/www
find /var/www -type d -exec chmod 2775 {} \;
find /var/www -type f -exec chmod 0664 {} \;
echo "<?php phpinfo(); ?>" > /var/www/html/phpinfo.php
上傳腳本到 S3
這次使用一個新的 CDK package 來完成這件事情,以下的功能就是上傳剛剛建立的 ec2-config/configure.sh 安裝腳本,並顯示上傳結果。
import * as assets from "@aws-cdk/aws-s3-assets";

const asset = new assets.Asset(this, "Asset", {
  path: path.join(__dirname, "../", "ec2-config", "configure.sh"),
});
new cdk.CfnOutput(this, "S3BucketName", { value: asset.s3BucketName });
new cdk.CfnOutput(this, "S3ObjectKey", { value: asset.s3ObjectKey });
new cdk.CfnOutput(this, "S3HttpURL", { value: asset.httpUrl });
new cdk.CfnOutput(this, "S3ObjectURL", { value: asset.s3ObjectUrl });
EC2 執行 User Data
在處理 User Data 我們需要處理兩個部分
- 從 S3 下載腳本
- 使用 User Data 執行腳本
從 S3 下載腳本
在 CDK 裡面有提供 User Data 可以直接下載 S3 檔案的 function,所以我們只需要填入 bucket 在上一步的 asset 有使用的 asset.bucket 與 bucketKey 一樣在上一部 asset 有使用過的 asset.s3ObjectKey,最後不要忘記給 Instance role 不然檔案會無法下載
const localPath = ec2Instance.userData.addS3DownloadCommand({
  bucket: asset.bucket,
  bucketKey: asset.s3ObjectKey,
});
asset.grantRead(ec2Instance.role);
使用 User Data 執行腳本
讓 EC2 User Data 直接執行上傳檔案的 localPath
ec2Instance.userData.addExecuteFileCommand({
  filePath: localPath,
  arguments: "--verbose -y",
});
整體部署腳本整合
部署 Web APP
在這邊我們使用單獨一台機器來做示範,所以並還沒有加入昨天說的 Bastion Host 而這次部署的內容含有:
- VPC
- SecurityGroup
- 開啟 22 Port
- 開啟 80 Port
- 上傳
ec2-config/configure.sh提供給 User Data 使用 - 架設 EC2
- 等級 t3.nano
- 使用 Image: AMAZON LINUX 2
- Subnet: Public
- User Data: 執行
configure.sh
const vpc = new ec2.Vpc(this, "VPC", {
  maxAzs: 3,
  natGateways: 0,
});

const mySecurityGroup = new ec2.SecurityGroup(this, "SecurityGroup", {
  vpc,
  allowAllOutbound: true,
});
mySecurityGroup.addIngressRule(
  ec2.Peer.anyIpv4(),
  ec2.Port.tcp(22),
  "allow public ssh access"
);
mySecurityGroup.addIngressRule(
  ec2.Peer.anyIpv4(),
  ec2.Port.tcp(80),
  "allow public http access"
);

const asset = new assets.Asset(this, "Asset", {
  path: path.join(__dirname, "../", "ec2-config", "configure.sh"),
});

const ec2Instance = new ec2.Instance(this, "Instance", {
  vpc,
  instanceType: ec2.InstanceType.of(
    ec2.InstanceClass.T3,
    ec2.InstanceSize.NANO
  ),
  machineImage: ec2.MachineImage.latestAmazonLinux({
    generation: ec2.AmazonLinuxGeneration.AMAZON_LINUX_2,
  }),
  securityGroup: mySecurityGroup,
  vpcSubnets: {
    subnetType: ec2.SubnetType.PUBLIC,
  },
  keyName: "KeyPair",
});
new cdk.CfnOutput(this, "EC2PublicDns", {
  value: ec2Instance.instancePublicDnsName,
});
new cdk.CfnOutput(this, "EC2PublicIp", {
  value: ec2Instance.instancePublicIp,
});

const localPath = ec2Instance.userData.addS3DownloadCommand({
  bucket: asset.bucket,
  bucketKey: asset.s3ObjectKey,
});
ec2Instance.userData.addExecuteFileCommand({
  filePath: localPath,
  arguments: "--verbose -y",
});
asset.grantRead(ec2Instance.role);
測試網頁
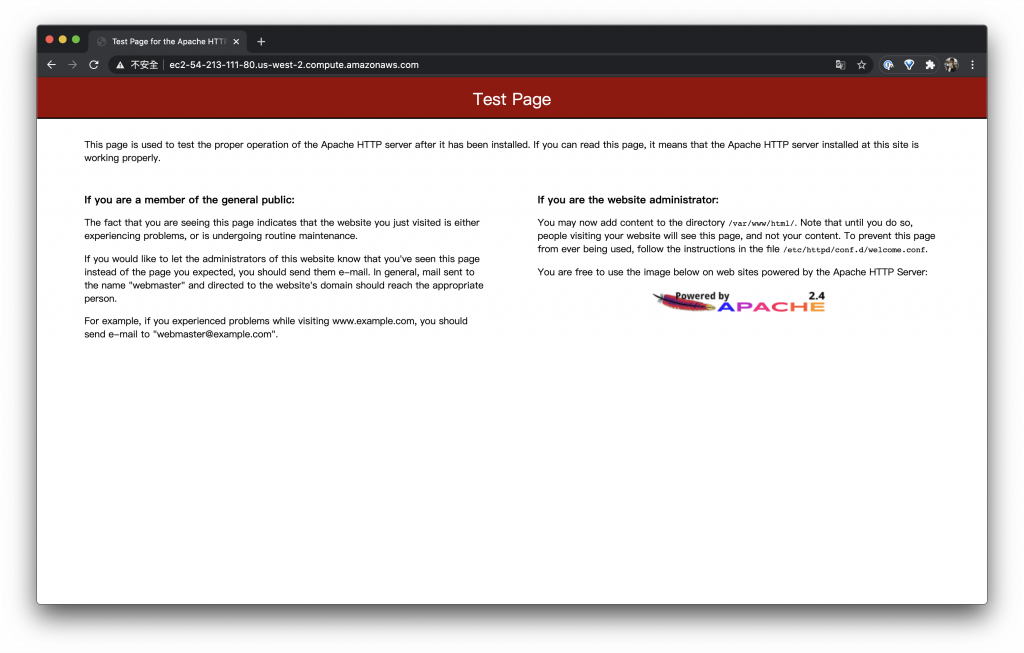
測試 Apache
在剛剛 CDK 的 output 找到 EC2PublicDns 看到測試 Web 頁面
CdkEc2Stack.EC2PublicDns = ec2-54-213-111-80.us-west-2.compute.amazonaws.com
測試 PHP
輸入測試 phpinfo 的網址測試 PHP 是否正常執行
http://ec2-54-213-111-80.us-west-2.compute.amazonaws.com/phpinfo.php
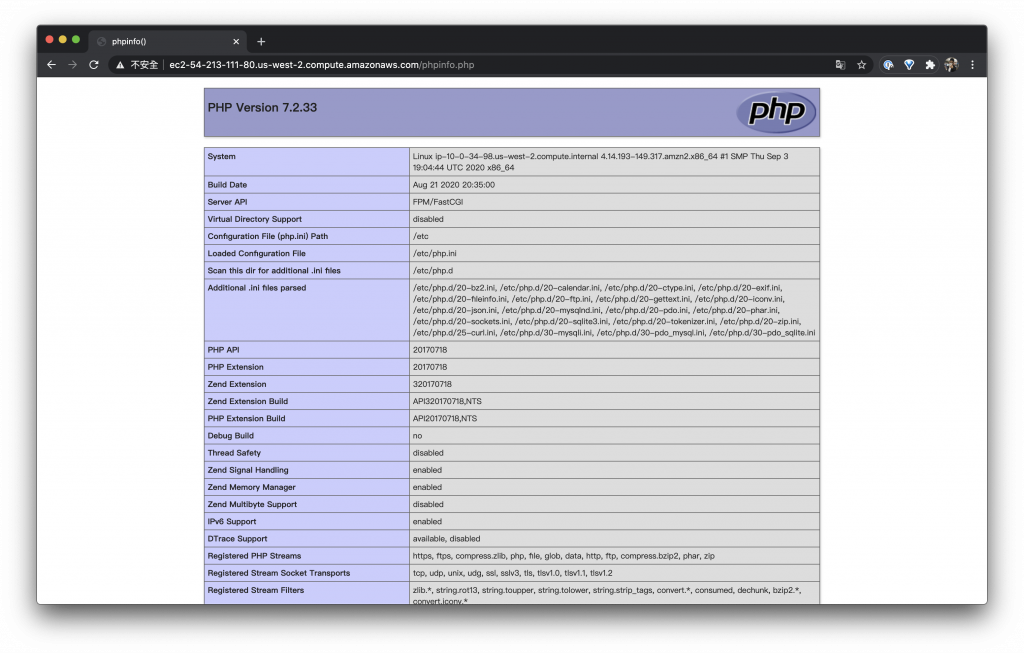
如果打開網頁直接出現了文字代表 PHP 安裝部分有問題請修改 AMI 為 AMAZON LINUX 2,這點要注意一下
結論
如此就擁有一台自動部署 lamp (Linux + Apache + MariaDB + PHP) 的機器了 終於說到 DevOps 的重點拉!(つ> _◕)つ︻╦̵̵͇̿̿̿̿╤───