今天要來介紹 Auto Scaling groups 通常我們簡稱 ASG,這是一個專門用來處理自動擴展的服務,它可以控制我們的 EC2 scale-in 與 scale-out

在雲端服務上常常使用自動擴展機制來增加或減少我們的容量,當使用服務的人數變多我們會開始做 scale-out 而人數變少就會開始做 scale-out 就可以理論上的達成系統容量無限的需求,不過在系統架構中並不是無限地增加機器就可以達到增加容量,還是會一直遇到不同的 bottleneck(瓶頸)
增加 Auto Scaling groups
基礎 Auto Scaling groups 介紹
簡單的 ASG 其實只要指定 VPC、instance type 與 machine image 就可以了,不過我想要在文裡面介紹怎麼與前幾天的 EC2 加上 User Data 做一個組合技
import * as autoscaling from "@aws-cdk/aws-autoscaling";

new autoscaling.AutoScalingGroup(this, 'ASG', {
  vpc,
  instanceType: ec2.InstanceType.of(ec2.InstanceClass.BURSTABLE2, ec2.InstanceSize.MICRO),
  machineImage: new ec2.AmazonLinuxImage() // get the latest Amazon Linux image
});
Auto Scaling groups 與 User Data 結合
所以就在基礎的 Auto Scaling groups 設定裡面做了一些改變,加入建立 EC2 Instance 的參數
- securityGroup
- vpcSubnets
- keyName
然後還有一個是 maxCapacity 為什麼要建立這個參數呢?因為就算 AWS 的機器是無限的錢包應該不會是無限的吧 XD
這邊在提醒大家一件事情 EC2 的數量在每個帳號都是有限制的可以在 Service Quotas 裡面看到它
const asg = new autoscaling.AutoScalingGroup(this, "ASG", {
  vpc,
  instanceType: ec2.InstanceType.of(
    ec2.InstanceClass.T3,
    ec2.InstanceSize.NANO
  ),
  machineImage: ec2.MachineImage.latestAmazonLinux({
    generation: ec2.AmazonLinuxGeneration.AMAZON_LINUX_2,
  }),
  securityGroup: mySecurityGroup,
  vpcSubnets: {
    subnetType: ec2.SubnetType.PUBLIC,
  },
  keyName: "KeyPair",
  minCapacity: 1,
  maxCapacity: 5,
});
設定 Auto Scaling groups 縮放條件
在自動縮放一定要設計條件,通常大家比較會設定的是 CPU 例如我們希望 CPU 70% 開始縮放就可以設定如下
autoScalingGroup.scaleOnCpuUtilization('KeepSpareCPU', {
  targetUtilizationPercent: 70
});
再來還有像是設定 Incoming Bytes 與 Outcoming Bytes 的方法可以用
autoScalingGroup.scaleOnIncomingBytes('LimitIngressPerInstance', {
    targetBytesPerSecond: 10 * 1024 * 1024 // 10 MB/s
});
autoScalingGroup.scaleOnOutcomingBytes('LimitEgressPerInstance', {
    targetBytesPerSecond: 10 * 1024 * 1024 // 10 MB/s
});
另外還有像是 Request Count 一般我們可能會稱這個數值是 RPS,所以以範例來說就是 1000 RPS 會縮放
autoScalingGroup.scaleOnRequestCount('LimitRPS', {
    targetRequestsPerSecond: 1000
});
程式總結
我們把整個程式整理一下目前擁有的功能
- VPC
- ASG
- 最大擴展數量 5
- 最小機器數量 1
- 設定 RPS 大於 1 時擴展
- EC2
- 設定 User Data 部署 LAMP
- ALB
const vpc = new ec2.Vpc(this, "VPC", {
  maxAzs: 3,
  natGateways: 0,
});

const mySecurityGroup = new ec2.SecurityGroup(this, "SecurityGroup", {
  vpc,
  allowAllOutbound: true,
});

const asset = new assets.Asset(this, "Asset", {
  path: path.join(__dirname, "../", "ec2-config", "configure.sh"),
});

const alb = new elbv2.ApplicationLoadBalancer(this, "ALB", {
  vpc,
  internetFacing: true,
});
new cdk.CfnOutput(this, "ApplicationLoadBalancerDNS", {
  value: alb.loadBalancerDnsName,
});

const albListener = alb.addListener("Listener", {
  port: 80,
  open: true,
});

const asg = new autoscaling.AutoScalingGroup(this, "ASG", {
  vpc,
  instanceType: ec2.InstanceType.of(
    ec2.InstanceClass.T3,
    ec2.InstanceSize.NANO
  ),
  machineImage: ec2.MachineImage.latestAmazonLinux({
    generation: ec2.AmazonLinuxGeneration.AMAZON_LINUX_2,
  }),
  securityGroup: mySecurityGroup,
  vpcSubnets: {
    subnetType: ec2.SubnetType.PUBLIC,
  },
  keyName: "KeyPair",
  minCapacity: 0,
  maxCapacity: 5,
});

const localPath = asg.userData.addS3DownloadCommand({
  bucket: asset.bucket,
  bucketKey: asset.s3ObjectKey,
});
asg.userData.addExecuteFileCommand({
  filePath: localPath,
  arguments: "--verbose -y",
});
asset.grantRead(asg.role);

albListener.connections.allowTo(asg, ec2.Port.tcp(80));

albListener.addTargets("Targets", {
  healthCheck: {
    enabled: true,
    path: "/phpinfo.php",
  },
  port: 80,
  targets: [asg],
});

asg.scaleOnRequestCount("LimitRPS", {
  targetRequestsPerSecond: 1,
});
部署測試
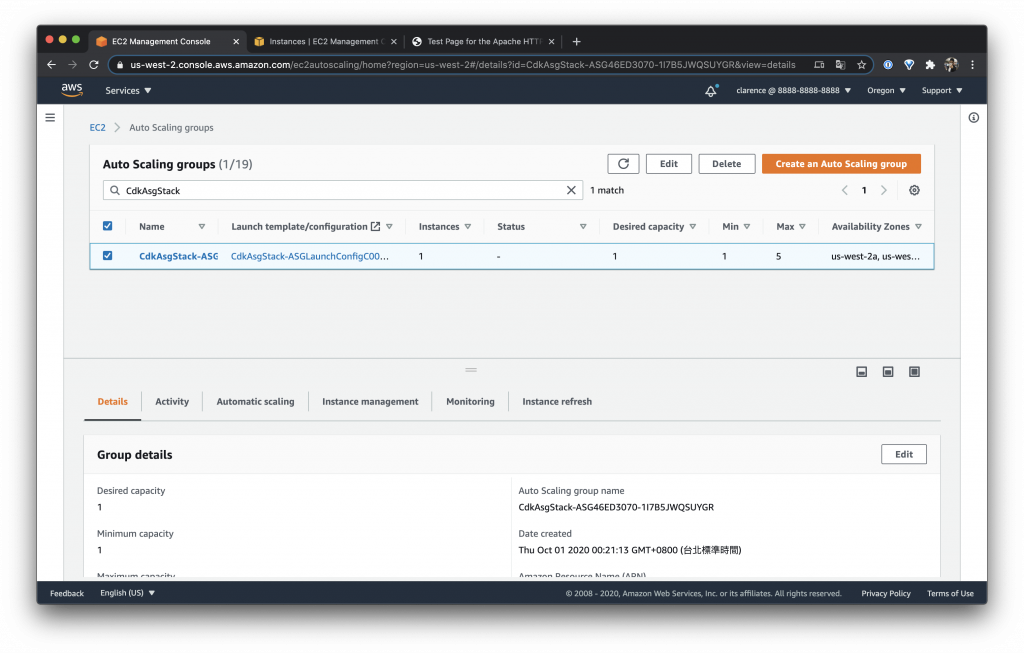
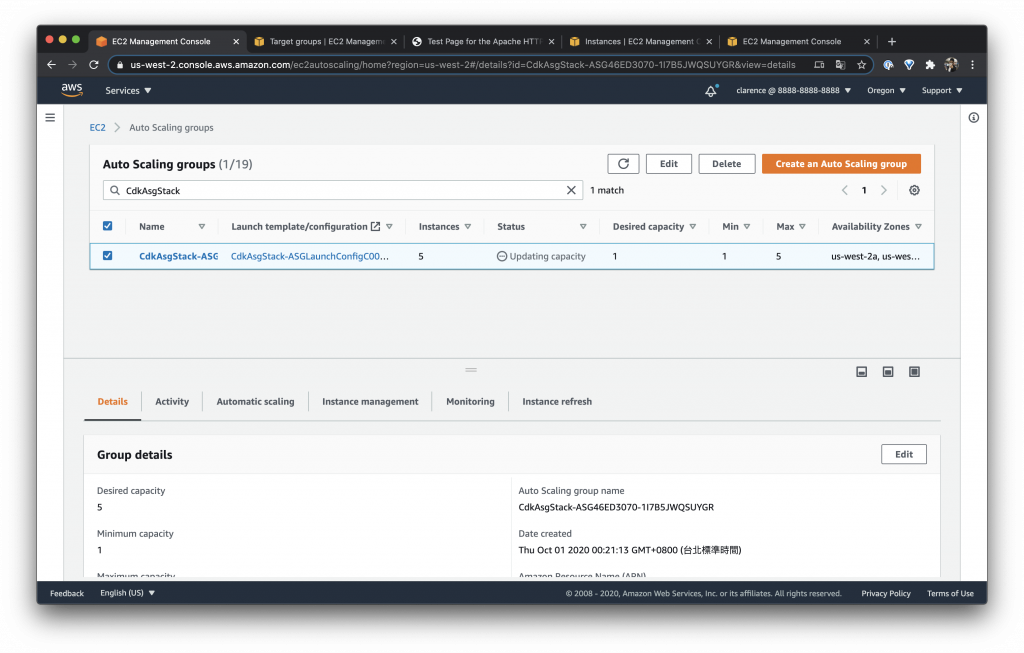
部署完成先到 Auto Scaling groups 看看部署結果可以看到
- Min 設定為 1
- Max 設定為 5
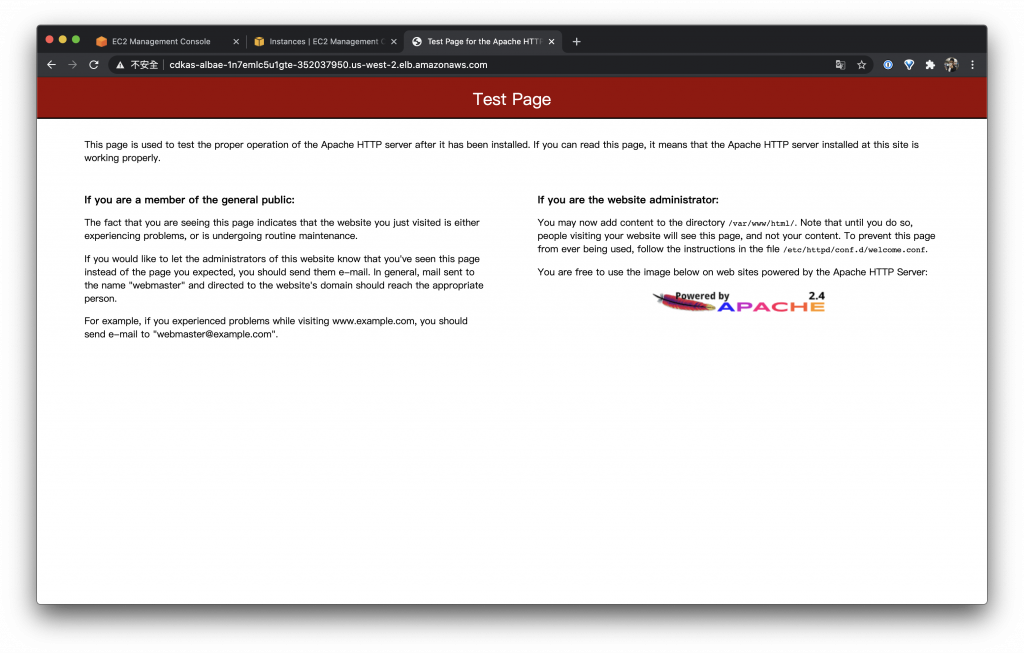
之後我們對 ASG 網頁給一點流量,基本上就是手動重新整理就好
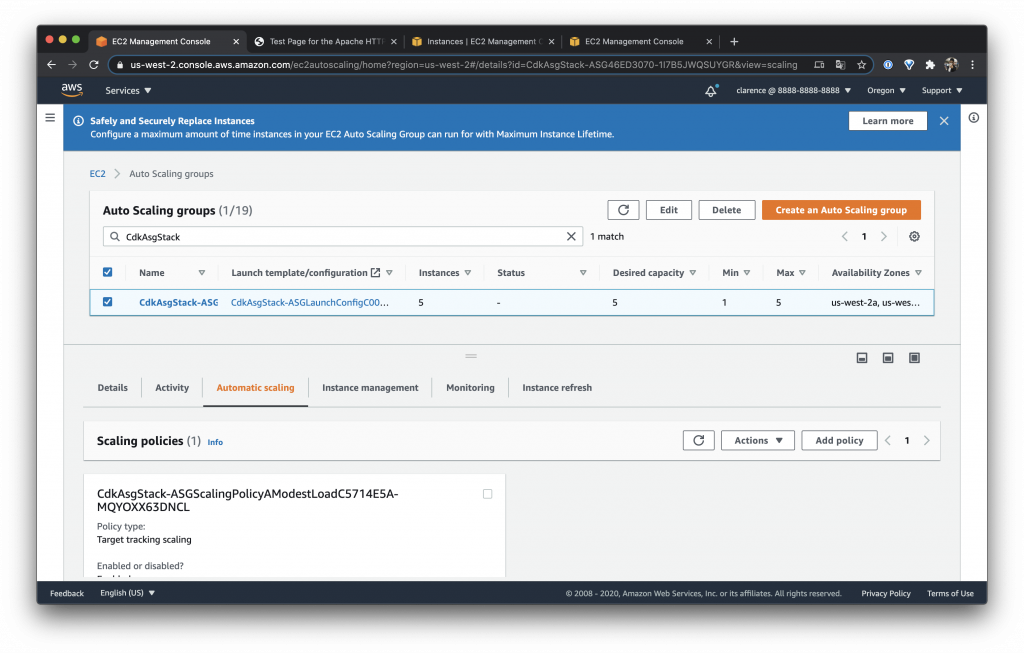
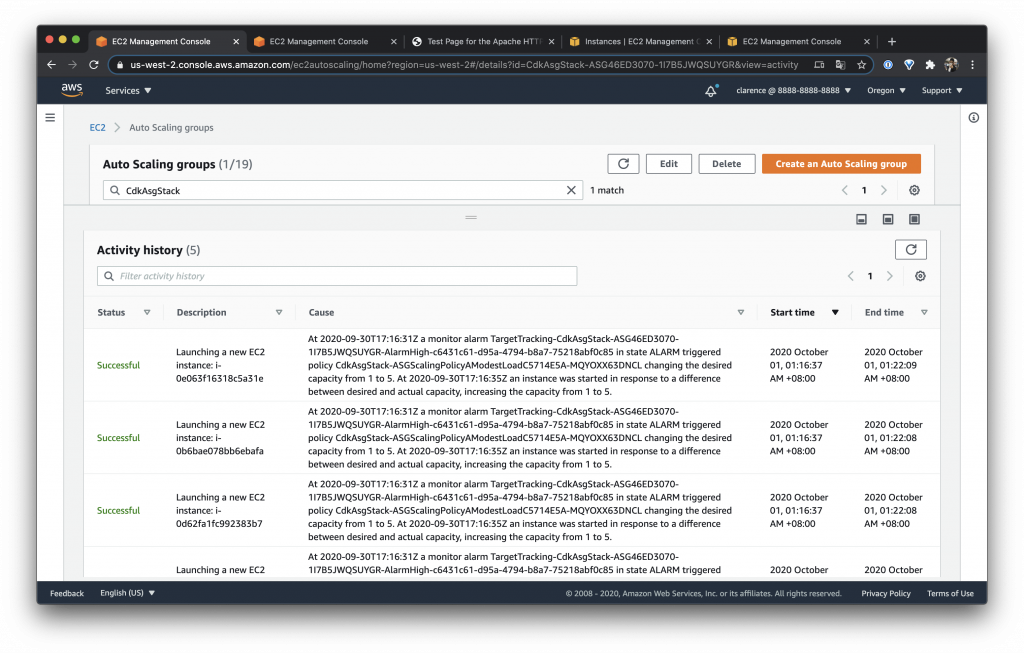
因為我們設定 RPS 大於 1 就會擴展,所以很快就可以看到 ASG 把 Desired 做變動 下圖設定為 5,是因為我在測試的時候不小心給太多流量,不然理論上應該會依造流量的需求慢慢增加
注意一下 ASG 會有一個反應時間並不會流量馬上進去就有反應因此如果沒有反應需要等它一下
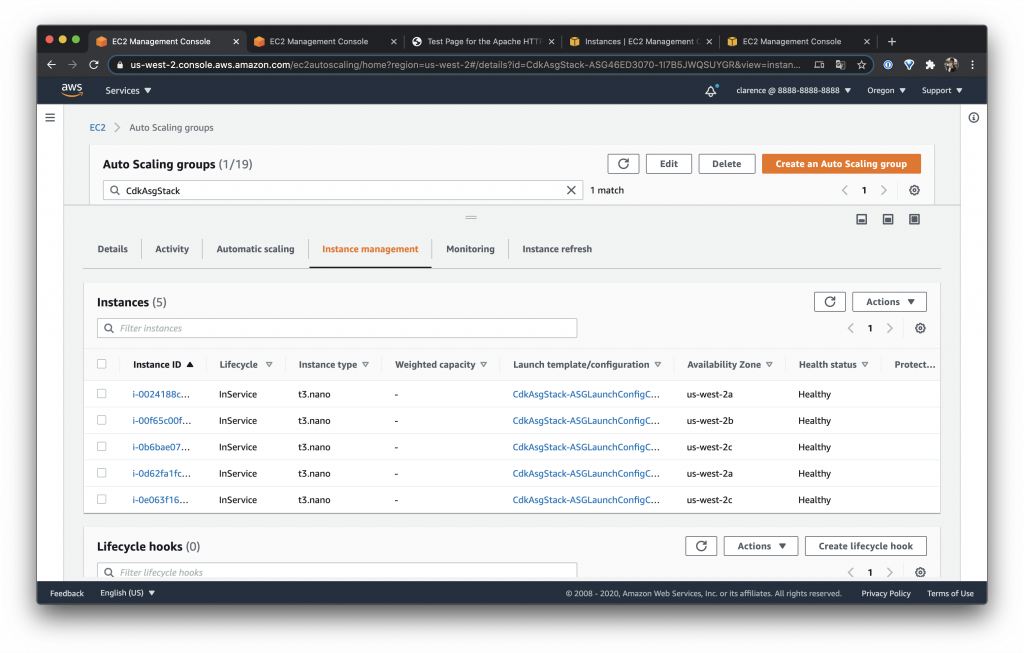
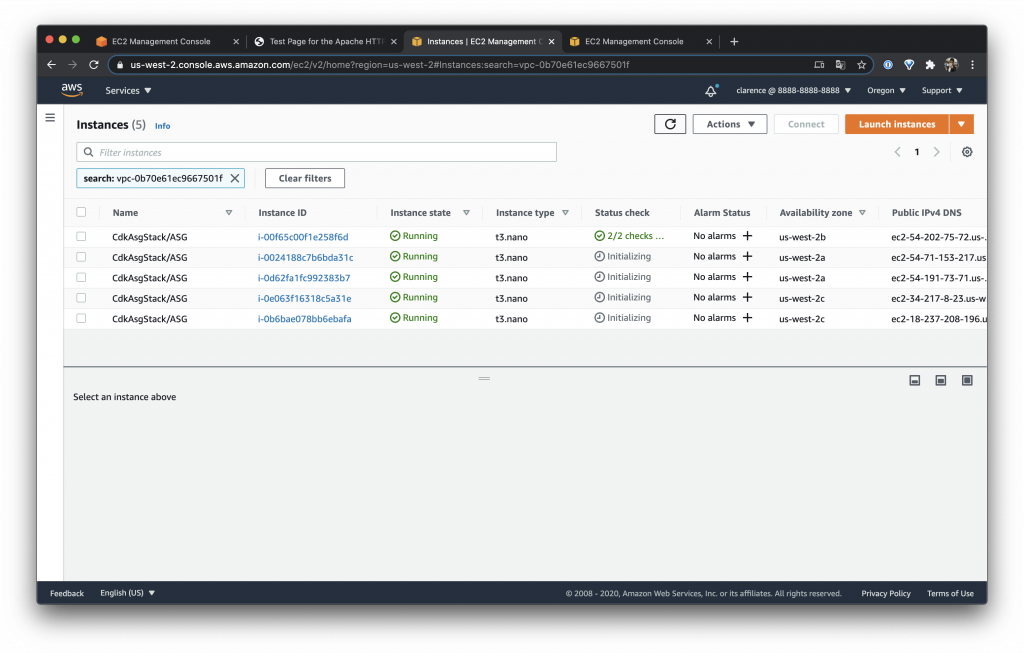
在 Auto Scaling groups 的 Instance management 可以看到受這個 ASG 管理的 EC2 有哪些
而在 Activity history 可以看到 ASG 被觸發的詳細紀錄
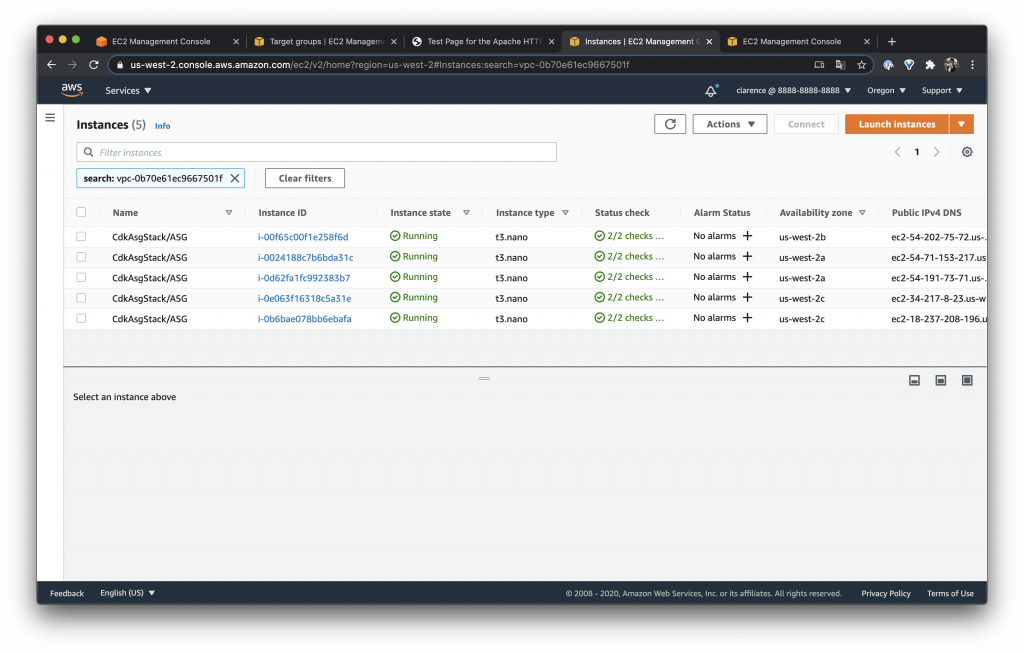
另外還可以到 EC2 看看機器的狀態,像是以下圖來看就可以看到 EC2 的機器正在 Initalizing
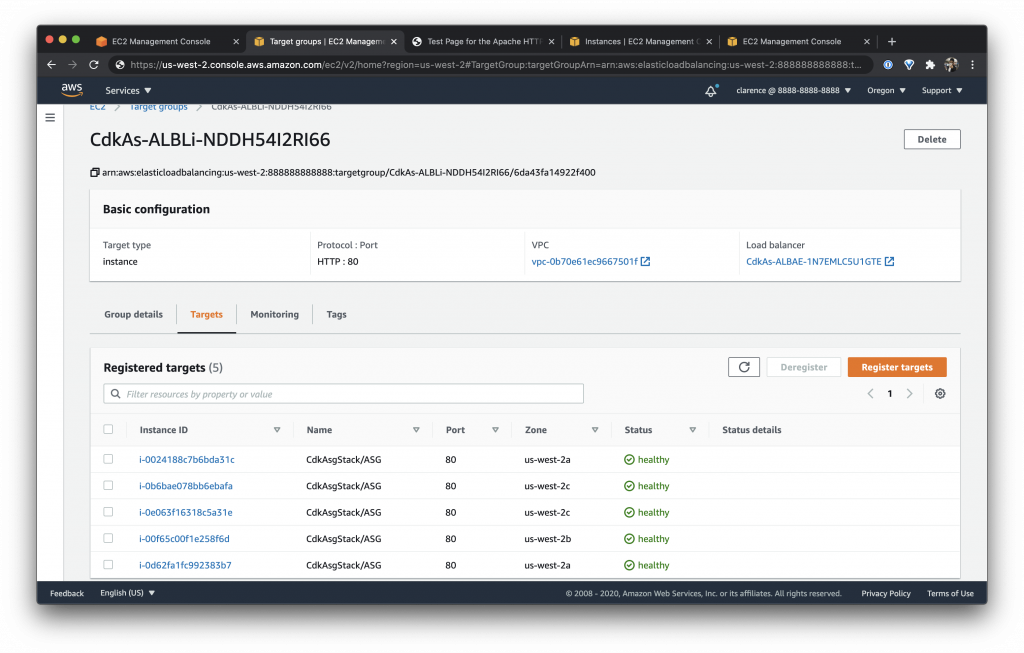
竟然我們的機器掛在 ASG 後面,當然也需要來看看 Target groups 可以看到機器很完美的都註冊上去了
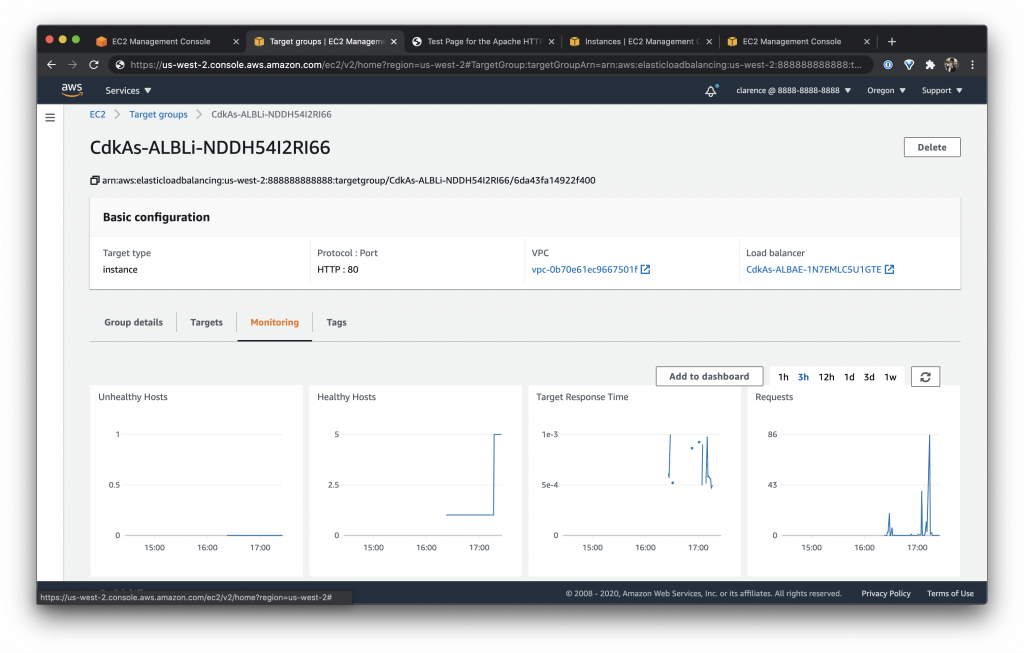
在 Target groups 上面也可以看到註冊的 Healthy Hosts 從原本的 1 台變成了 5 台
過了 5 min 後因為沒有流量再進去了就可以看到 ASG 自動幫我們把 Desited 設定成 2,並且狀態變成了 Updating capacity

觀察一下 Targets 就會看到機器開始 draining
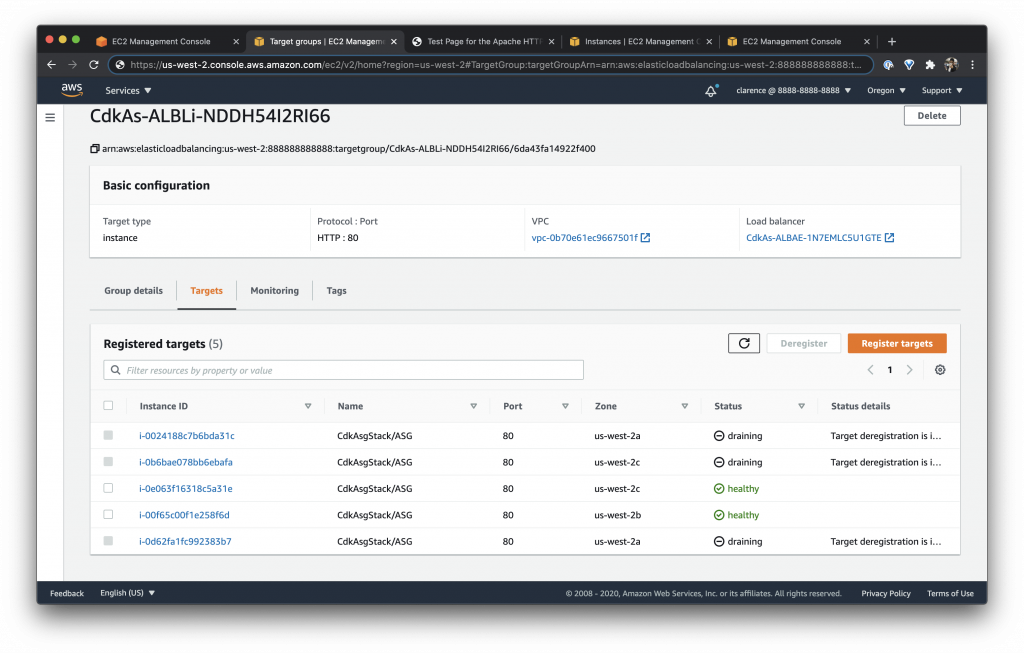
機器雖然在 draining 不過機器不會馬上被收掉,要等到完全脫離 Targets 才會慢慢的被移除
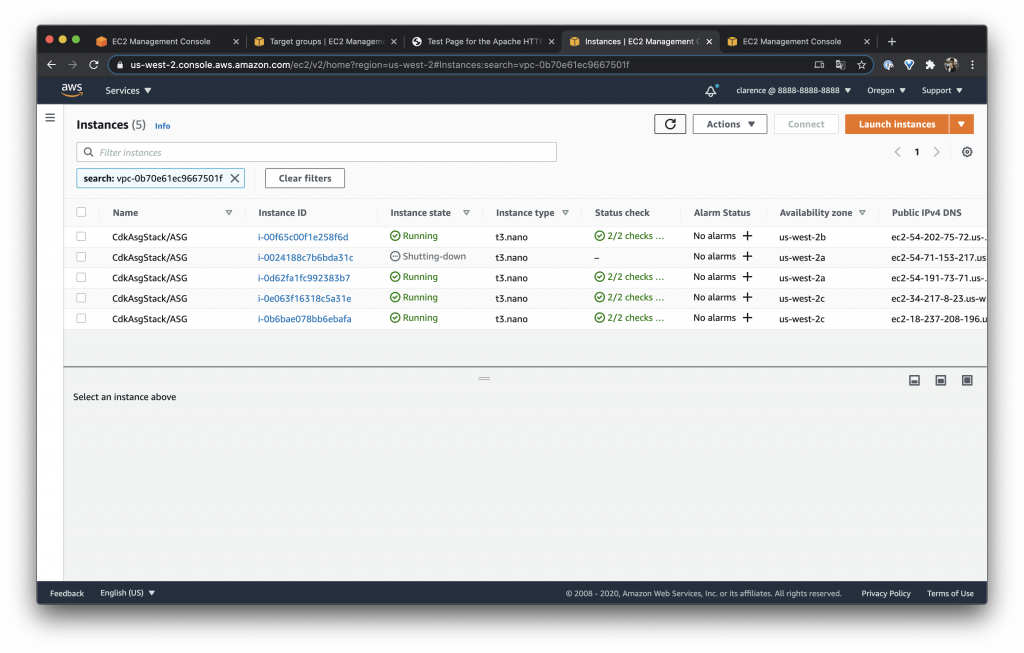
再過一段時間再看看 EC2 的 Instance 就會發現有的機器狀態開始變成了 Shutting-down 了
再過一段時間 ASG 的 Desited capacity 變成了 2

Targets 也變成了 2

再過許久就會看到整個 ASG 狀態被還原到最初的狀態
今天的文章比平常多了更多的圖片,不知道這樣大家是不是會比較喜歡,如果可以就在下面給點回應吧!