昨天說明了如何控制 ECS 的 Cluster,今天介紹如何使用 ECS Service

要跑服務在 ECS 上面就會使用到 ECS Service,因為我們需要一個服務去管理我們的 Task 讓它可以做到自動擴展或是死掉重啟等功能
今天目標是如何在 ECS 上面跑一個 amazon/amazon-ecs-sample 的 container,並且讓 ALB 的 80 port 可以直接使用這個 container 的 Service
使用 ECS 建立網頁服務
建立 Ec2TaskDefinition
在建立 Service 之前我們需要先建立一個 EC2 Task Definition,一個 Task 裡面可以有很多的 Container,感覺就像把多個 Container 服務做一個打包,而通常會把有關係的服務一起打包或是內部需要相互呼叫的服務
const taskDefinition = new ecs.Ec2TaskDefinition(this, "TaskDef");
在 EC2 Task Definition 建立 Container
以目前目標只需要在 Task Definition 加入一個 Container
image
image 使用前面說的 amazon/amazon-ecs-sample
如果想要知道這個 image 主要內容是什麼可以看一下 Github repo
memory limit
這裏設定為 16 M 可以抓一下平常需要用的記憶體大小來設定這個值
logging
我比較喜歡使用 AWS Logs 所以先介紹它,這邊需要設定一個 streamPrefix 設定一個好辨識服務的值
設定完後的 Log 在 CloudWatch 格式
prefix-name/container-name/ecs-task-id
詳細可以參考文件
其實我滿喜歡用 AWS Logs 的其中一個原因是可以直接在 ECS Service 下面就直接看到 Logs 對於 Debug 滿有幫助的
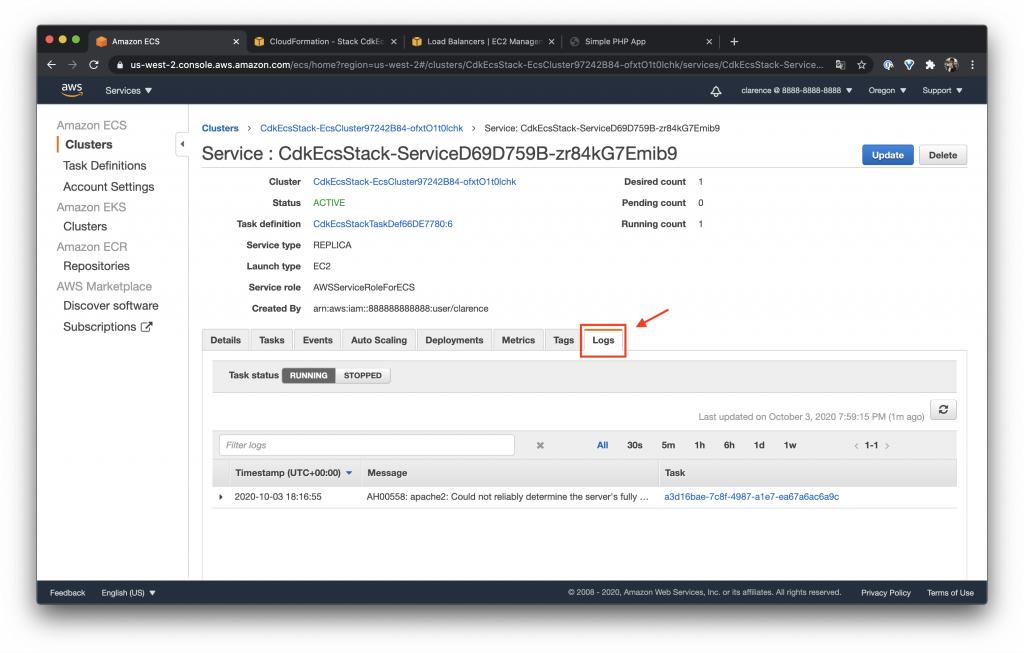
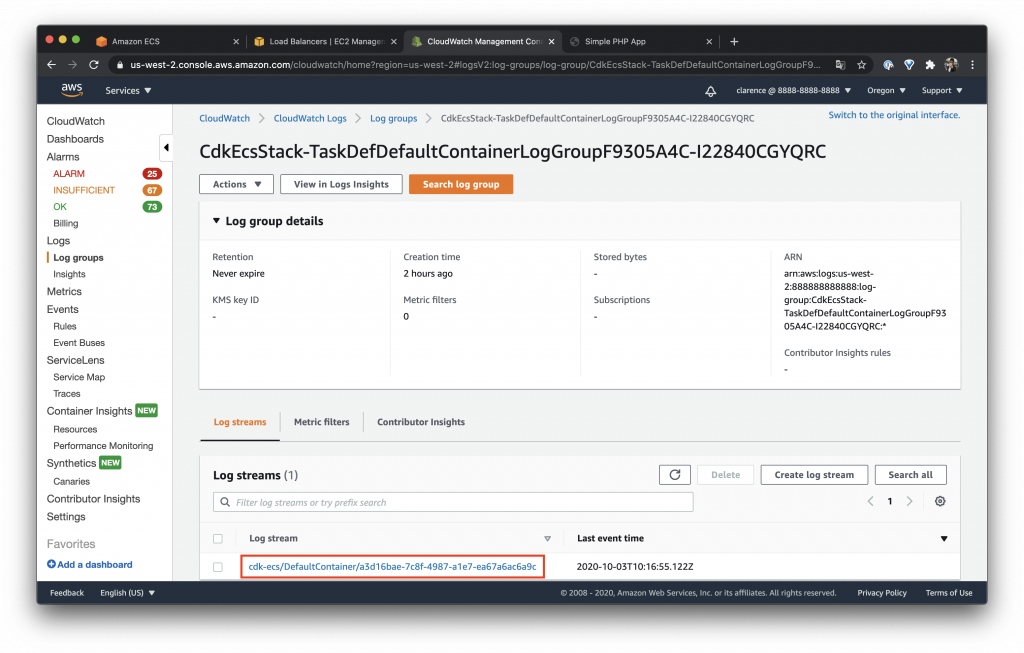
另一個觀看 Logs 的方式是直接到 CloudWatch
大家可以觀察一下剛剛設定的 prefix-name 範例設定為 cdk-ecs 所以 Log 就變成了 cdk-ecs/DefaultContainer/a3d16bae-7c8f-4987-a1e7-ea67a6ac6a9c
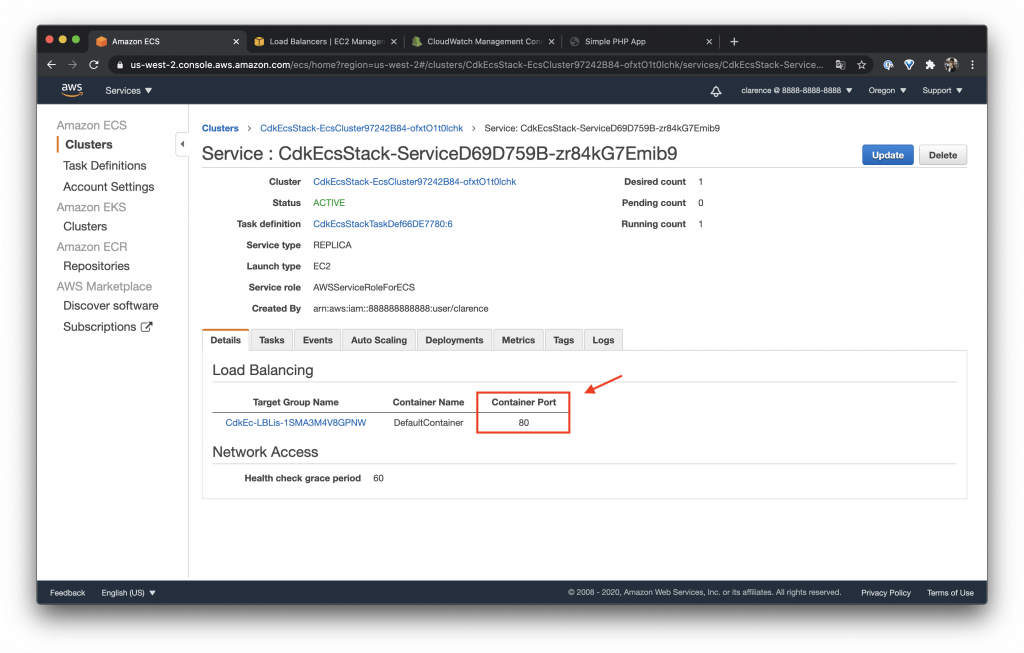
container port
我們需要先設定 container 內部 port 因為等等我們要設定 ALB 跟它做一個對應
const container = taskDefinition.addContainer("DefaultContainer", {
  image: ecs.ContainerImage.fromRegistry("amazon/amazon-ecs-sample"),
  memoryLimitMiB: 16,
  logging: ecs.LogDrivers.awsLogs({ streamPrefix: "cdk-ecs" }),
});
container.addPortMappings({
  containerPort: 80,
});
設定完後可以在 ECS Service 裡面看到它
設定 ECS Service
設定完 ECS Task Definition 後我們需要把 Cluster 與 Task 經由 Service 做一個連接,讓它成為一個 ECS Service
const ecsService = new ecs.Ec2Service(this, "Service", {
  cluster,
  taskDefinition,
});
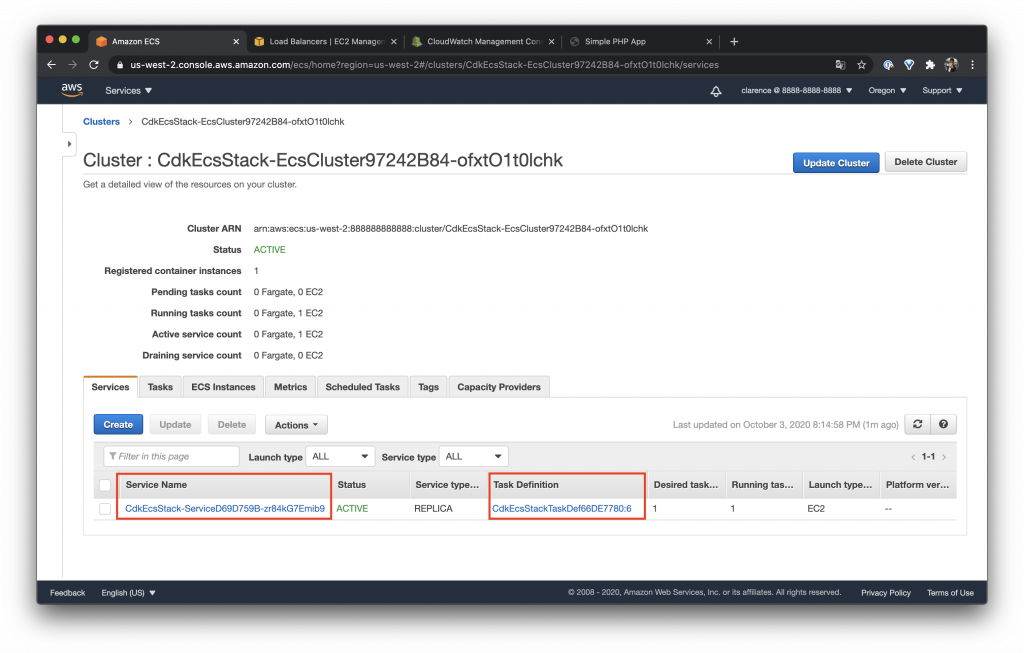
部署之後就可以看到 Cluster 上面跑了一個 CdkEcsStack-Service 而它的 Task Definition 為 CdkEcsStackTaskDef
設定 ALB
最後設定 ALB 把整個服務串起來,設定方法與之前介紹 ALB 大同小異,大家忘記的可以回去參考一下之前的內容
const lb = new elbv2.ApplicationLoadBalancer(this, "LB", {
  vpc,
  internetFacing: true,
});
const listener = lb.addListener("Listener", { port: 80 });
const targetGroup = listener.addTargets("ECS", {
  port: 80,
  targets: [ecsService],
});
整理一下今天的內容
有一個地方忘記提到我們的 ECS Cluster 預設會部署在 private subnet 所以要設定 NAT Gateway 為 1 不然會有問題呦!
const vpc = new ec2.Vpc(this, "Vpc", { maxAzs: 3, natGateways: 1 });

const cluster = new ecs.Cluster(this, "EcsCluster", { vpc });

const autoScalingGroup = cluster.addCapacity(
  "DefaultAutoScalingGroupCapacity",
  {
    instanceType: ec2.InstanceType.of(
      ec2.InstanceClass.T3,
      ec2.InstanceSize.MICRO
    ),
    minCapacity: 1,
    desiredCapacity: 1,
    maxCapacity: 6,
    machineImage: ecs.EcsOptimizedImage.amazonLinux2(),
    spotPrice: "0.0136",
    spotInstanceDraining: true,
  }
);
autoScalingGroup.scaleOnCpuUtilization("KeepCpuHalfwayLoaded", {
  targetUtilizationPercent: 50,
});

const taskDefinition = new ecs.Ec2TaskDefinition(this, "TaskDef");

const container = taskDefinition.addContainer("DefaultContainer", {
  image: ecs.ContainerImage.fromRegistry("amazon/amazon-ecs-sample"),
  memoryLimitMiB: 16,
  logging: ecs.LogDrivers.awsLogs({ streamPrefix: "cdk-ecs" }),
});
container.addPortMappings({
  containerPort: 80,
});

const ecsService = new ecs.Ec2Service(this, "Service", {
  cluster,
  taskDefinition,
});

const lb = new elbv2.ApplicationLoadBalancer(this, "LB", {
  vpc,
  internetFacing: true,
});
const listener = lb.addListener("Listener", { port: 80 });
const targetGroup = listener.addTargets("ECS", {
  port: 80,
  targets: [ecsService],
});
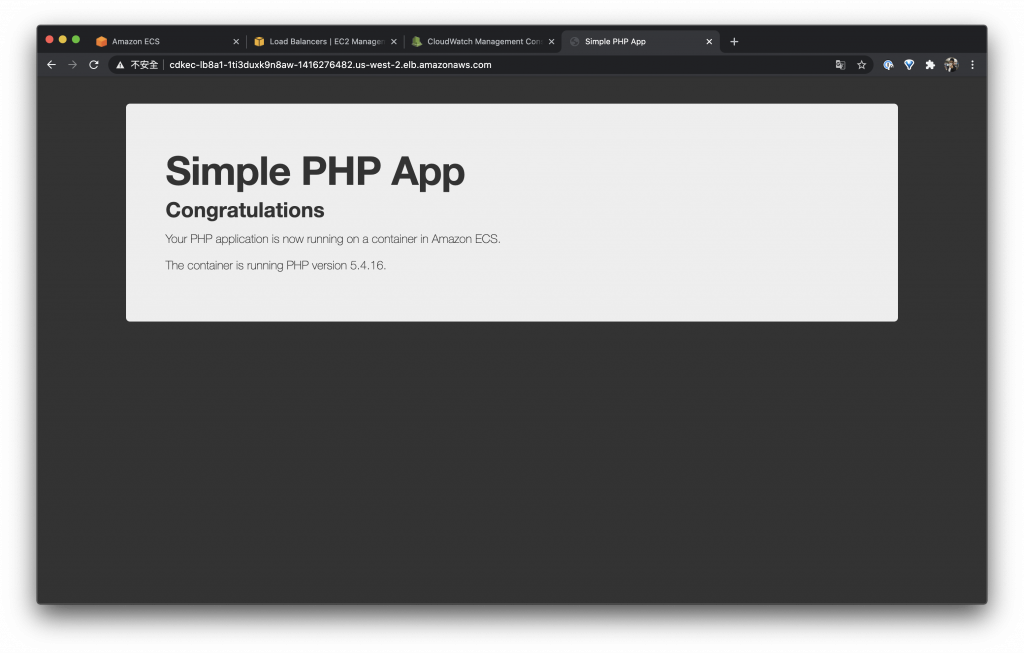
測試服務
使用我們的 ALB 網址連進去就可以看到一個準備好的 Simple PHP App 測試頁面
今天主要把整個 ECS 要部署一個服務的方法介紹一遍,希望可以幫助除了在寫 CDK 的朋友也可以幫助到正在學習 ECS 的朋友 XD ~