本文同步刊載於 iT 邦幫忙第11屆鐵人賽:[LINE bot 好好玩 30 天玩轉 LINE API] 第 17 天:誰說 Flex Message 不能做進度條
前言
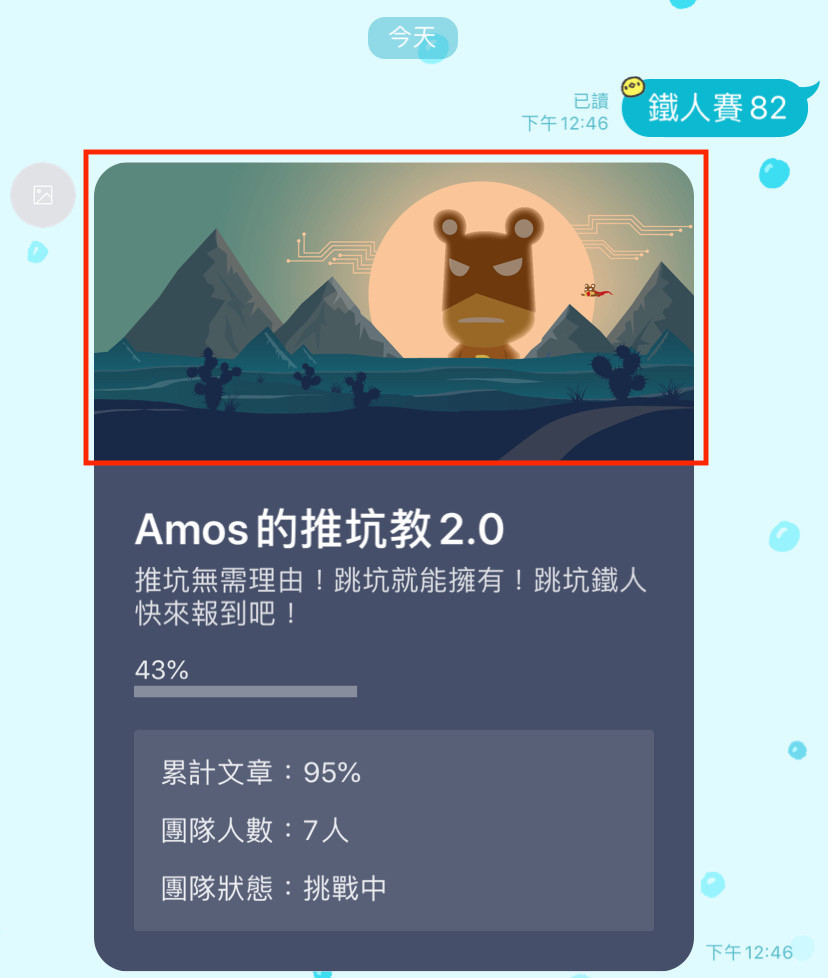
昨天賣了關子說要做一個頁面,今天就來頁面大解析吧!
先到 Flex Message Simulator BETA ver
建立 header
首先要來建立 header 的地方
- 打開之後出現一個範例,不過我們不要這個範例
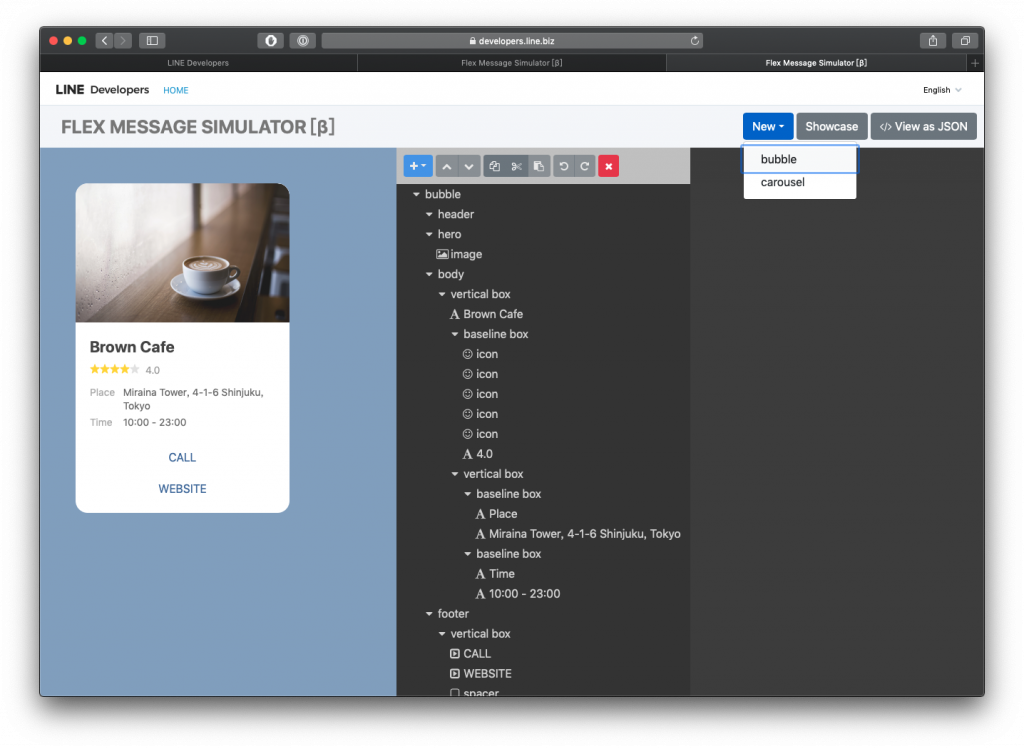
- 點選 New 建立一個 bubble
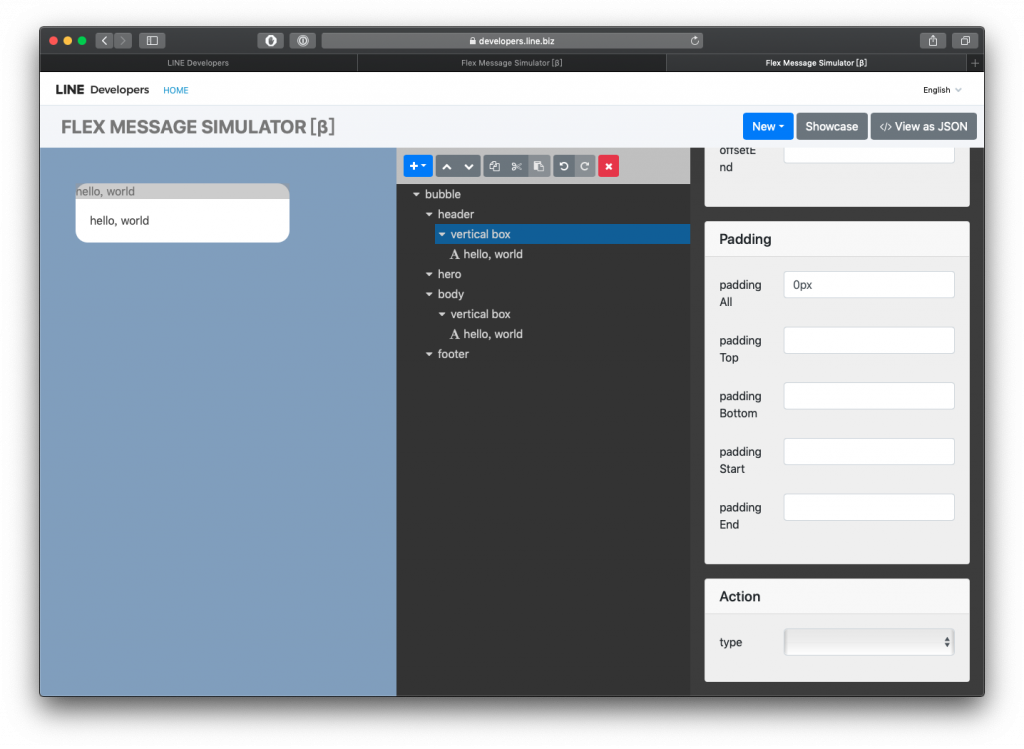
- 在 header 建立一個 box,並且把 paddingAll 改成
0px
- 在 vertical box 下面加入一個 image 並且把剛剛的
hello, world移除
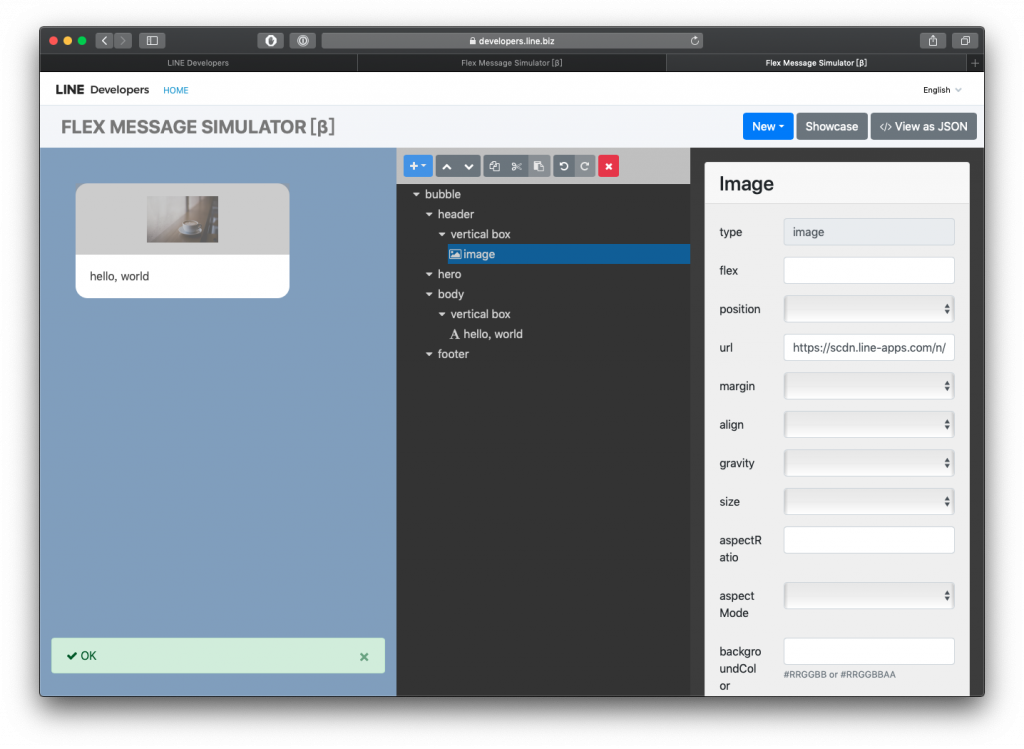
- 修改 flex, size, aspectRatio 與 aspectMode
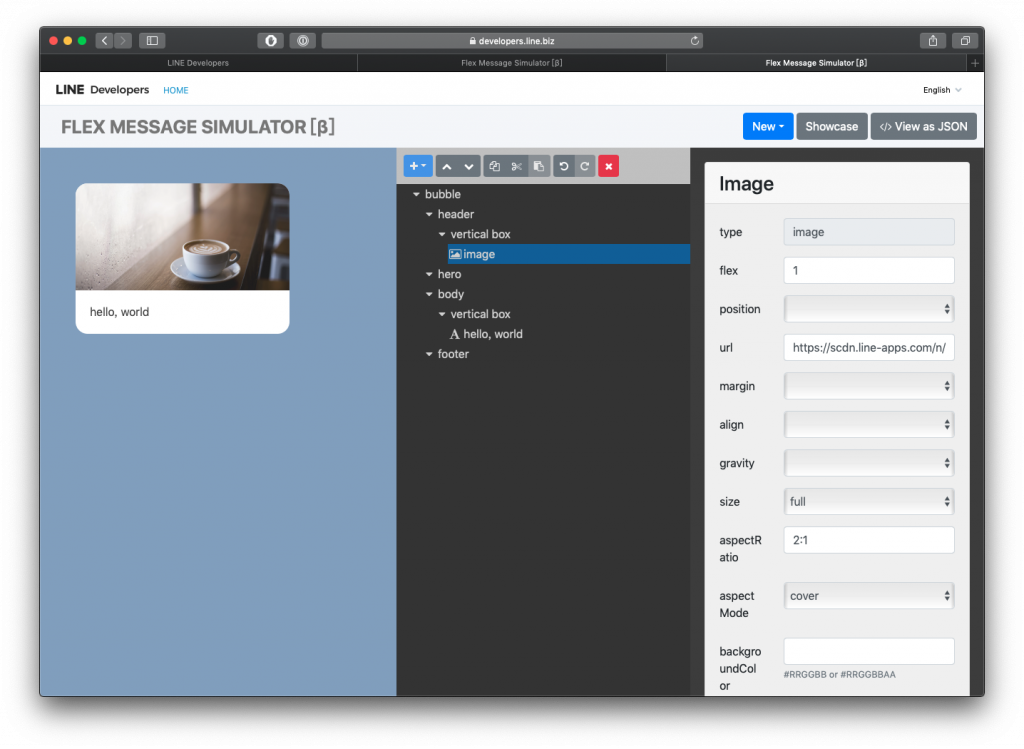
我們的 header 做出來了!
建立 body
body 第一部分
- 在
vertical box建立 box

為什麼要在 vertical box 再建立一個 box 呢?那是因為 vertical box 是這個部分
我們再建立的 box 是這個部分
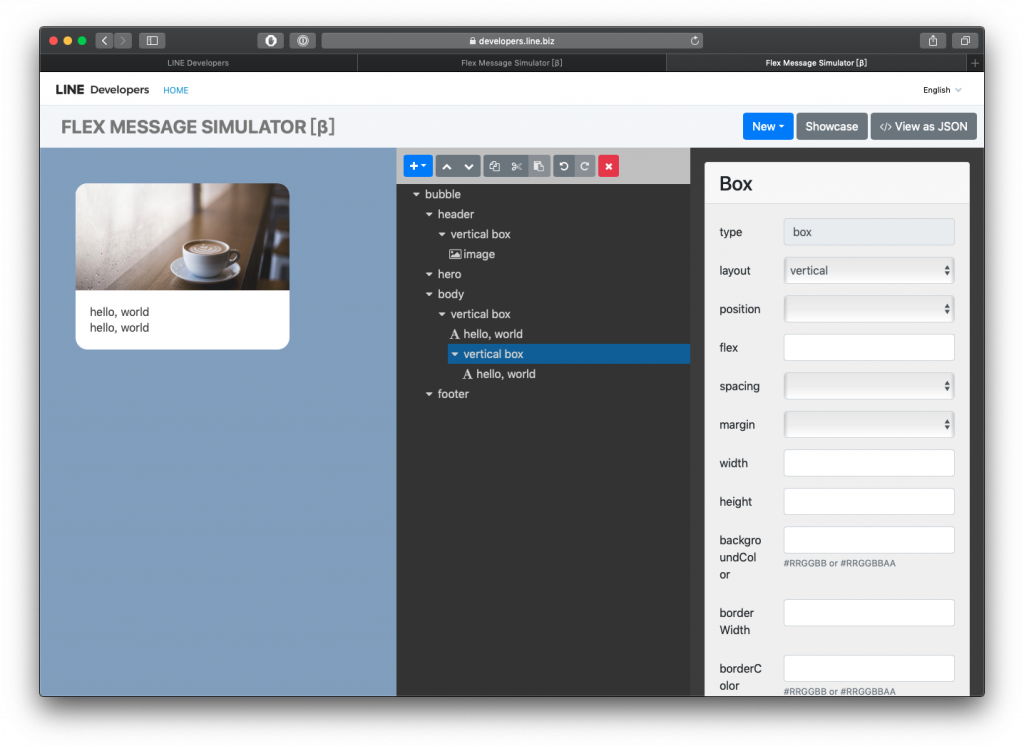
- 修改一下
vertical box將backgroundColor改為#464F69
- 移除 兩層
hello, world並起再加入一層 box,放入文字 - text: Amos的推坑教2.0
- size: xl
- color: #ffffff
- weight: bold
body 第二部分
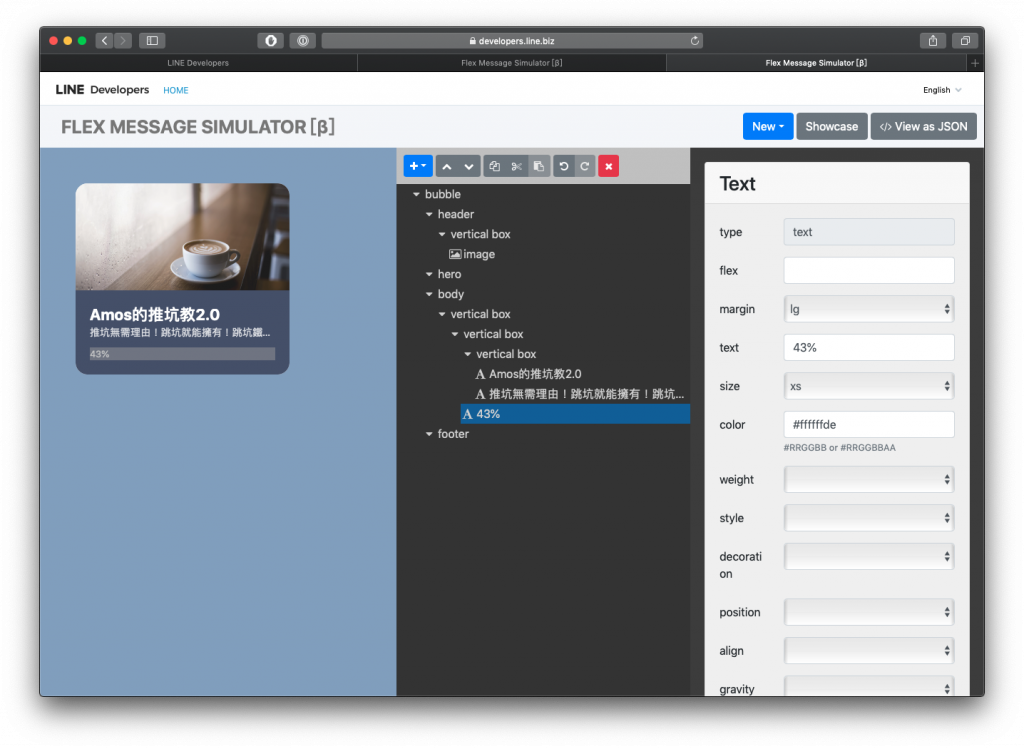
再來應該是大家最期待的,怎麼做進度條呢?
- 放入 % 數
- margin: lg
- text: 43%
- size: xs
- color: #ffffffde
- 在 body 的下面再建立一層 box 然後在他的下面再一個 box
其實筆者也覺得這樣做很麻煩 XDD,看圖比較容易懂
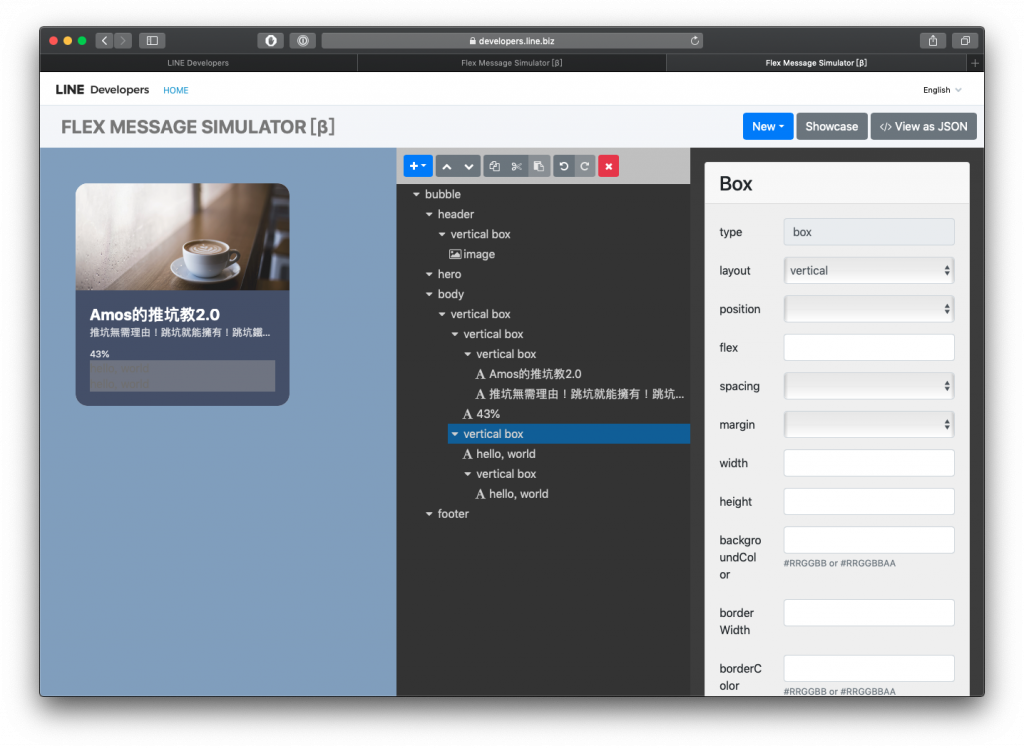
- 把
hello, word都移除
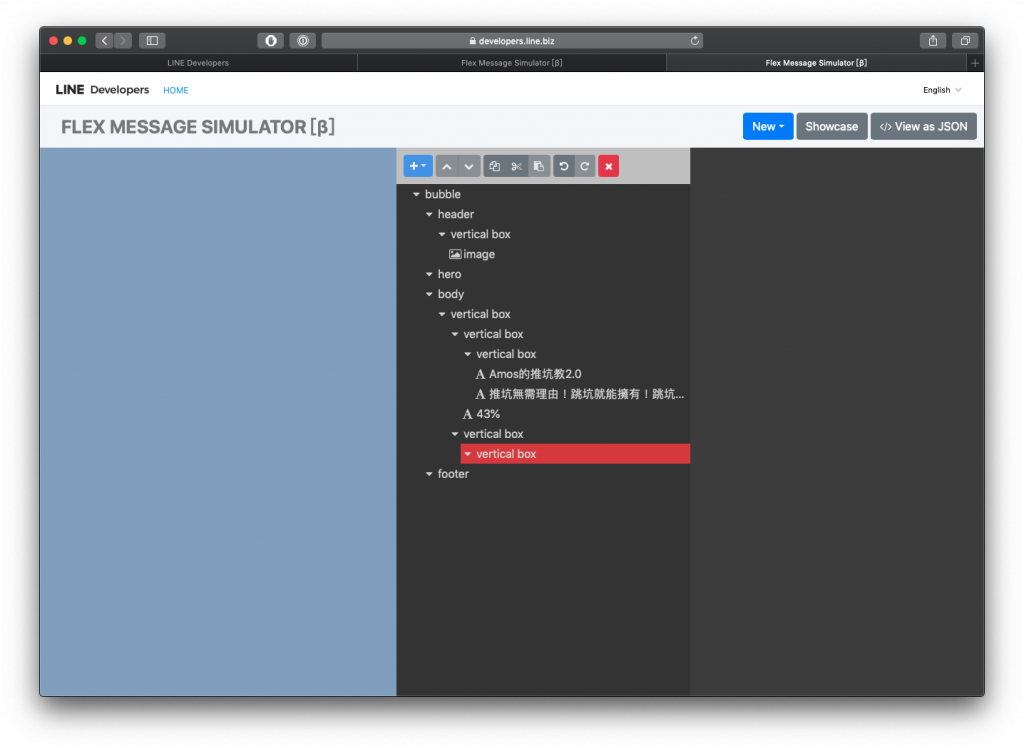
慘了出現錯誤了怎麼辦?出現錯誤的原因是因為 vertical box 下面是不可以空的,所以跳出錯誤,這時候我們要在下面加入東西給他
- 加入 filler
- 修改第二層的 vertical box
- width: 43%
- height: 6px
- backgroundColor: #ffffff5A
看看我們的進度條出現拉!
body 第三部分
- 在 body 的下面再建立一層 box 然後在它的下面再一個 box,修改一下數值
- margin: xl
- backgroundColor: #ffffff1A
- cornerRadius: 2px
- paddingAll: 13px
看看我們的小框框出現了
- 新增一下文字
- margin: lg
- text: 累計文章:95
- size: sm
- color: #ffffffde
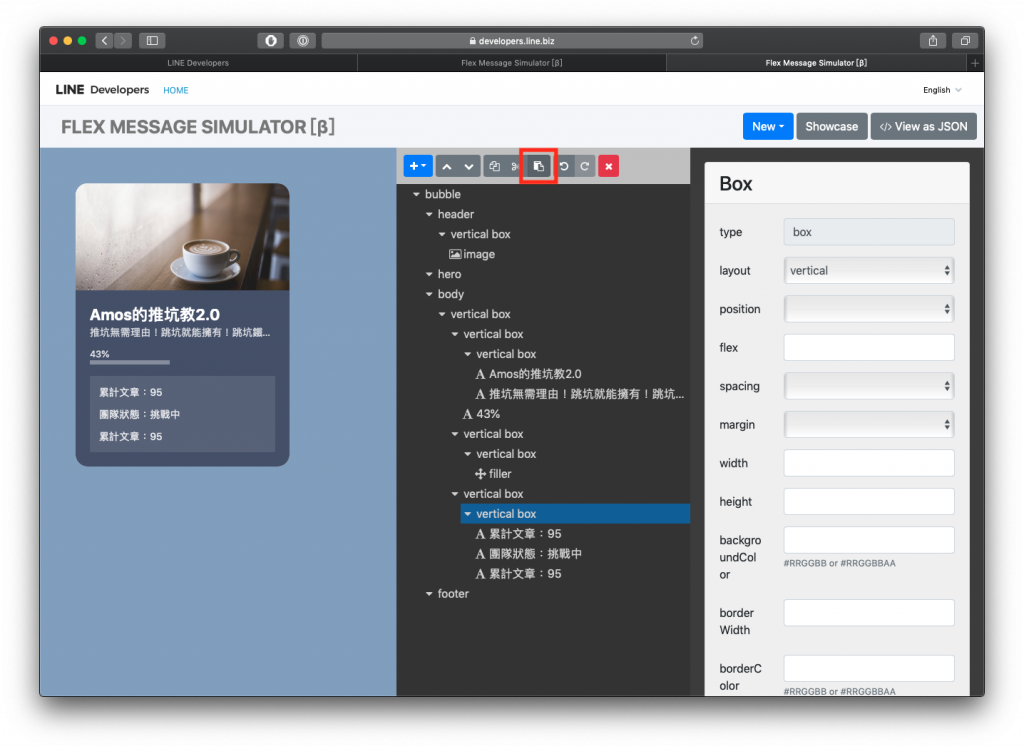
- 介紹一下複製貼上的功能
選取累計文章:95點選複製
這個地方是沒有辦法直接貼上的呦!
我們要點選上層的 vertical box 然後按貼上
結果 JSON 大公開
如果看不懂上面的教學也想要這個樣板怎麼辦?這邊不藏私的直接大公開!
{
  "type": "bubble",
  "header": {
    "type": "box",
    "layout": "vertical",
    "contents": [
      {
        "type": "image",
        "url": "https://scdn.line-apps.com/n/channel_devcenter/img/fx/01_1_cafe.png",
        "flex": 1,
        "size": "full",
        "aspectRatio": "2:1",
        "aspectMode": "cover"
      }
    ],
    "paddingAll": "0px"
  },
  "body": {
    "type": "box",
    "layout": "vertical",
    "contents": [
      {
        "type": "box",
        "layout": "vertical",
        "contents": [
          {
            "type": "box",
            "layout": "vertical",
            "contents": [
              {
                "type": "text",
                "text": "Amos的推坑教2.0",
                "size": "xl",
                "color": "#ffffff",
                "weight": "bold",
                "wrap": true
              },
              {
                "type": "text",
                "text": "推坑無需理由!跳坑就能擁有!跳坑鐵人快來報到吧!",
                "size": "sm",
                "color": "#ffffffcc"
              }
            ]
          },
          {
            "type": "text",
            "text": "43%",
            "size": "xs",
            "margin": "lg",
            "color": "#ffffffde"
          }
        ]
      },
      {
        "type": "box",
        "layout": "vertical",
        "contents": [
          {
            "type": "box",
            "layout": "vertical",
            "contents": [
              {
                "type": "filler"
              }
            ]
          }
        ],
        "width": "43%",
        "backgroundColor": "#ffffff5A",
        "height": "6px"
      },
      {
        "type": "box",
        "layout": "vertical",
        "contents": [
          {
            "type": "box",
            "layout": "vertical",
            "contents": [
              {
                "type": "text",
                "text": "累計文章:95",
                "margin": "lg",
                "size": "sm",
                "color": "#ffffffde"
              },
              {
                "type": "text",
                "text": "團隊人數:7人",
                "margin": "lg",
                "size": "sm",
                "color": "#ffffffde"
              },
              {
                "type": "text",
                "text": "團隊狀態:挑戰中",
                "margin": "lg",
                "size": "sm",
                "color": "#ffffffde"
              }
            ]
          }
        ],
        "margin": "xl",
        "backgroundColor": "#ffffff1A",
        "cornerRadius": "2px",
        "paddingAll": "13px"
      }
    ],
    "backgroundColor": "#464F69"
  }
}
總結
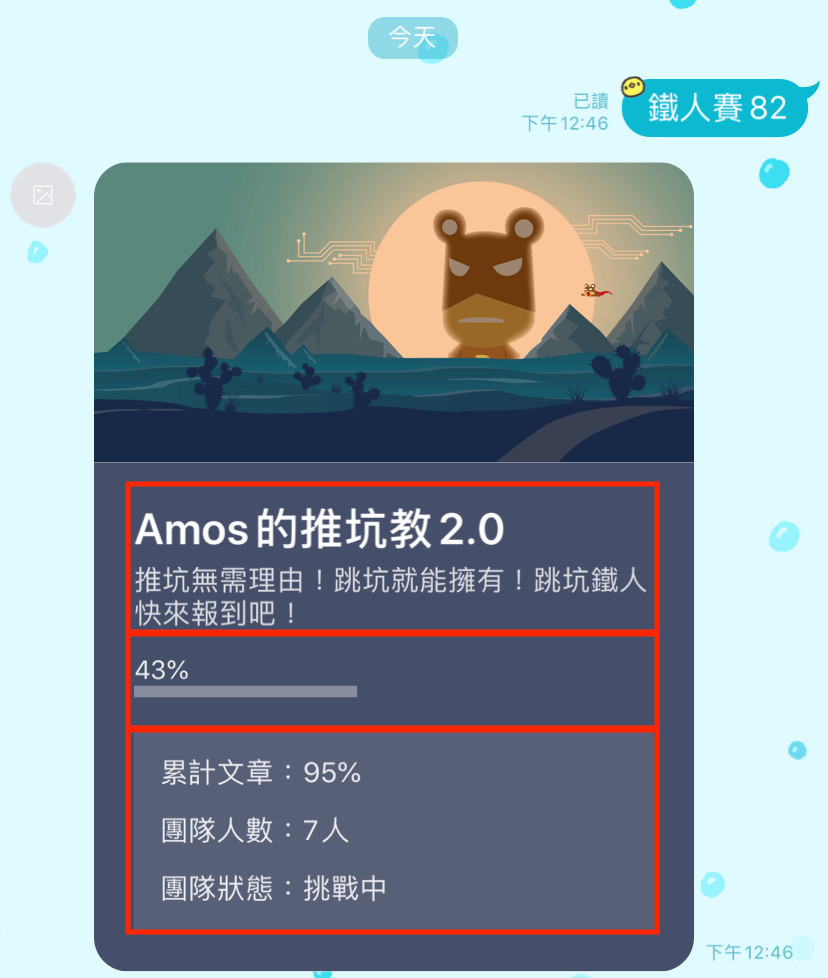
目前這個範例是一個用 LINE 新功能做出進度條的一個範例,歡迎大家多多利用拉 ~