最近我把滿多 API 記錄在 Postman 上面的,因為它要分享跟測試其實都滿方便的可以 export 分享給別人使用。如果人在外面也有線上版本的 Postman 可以直接戳就不一定需要把電腦拿出來,雖然比較難操作不過急用是可以解決問題的。
Postman 無法下載成離線文件觀看
不過最近遇到一個問題就是 Postman 雖然有網頁版的 API 文件可以直接分享 (本文以 API 101 為範例),如此連結:API 101
不過它並不支援直接下載成離線文件,不過也滿有道理的畢竟 Postman 帳號是需要付費的,當然希望大家直接線上觀看而且線上版本也還有不少好用的功能。
突破 Postman 無法下載離線文件的限制
不過我們還是會希望可以下載成離線文件畢竟在公司文件還是需要留存的,本篇就來說明如何突破這個限制
首先先開啟 Postman 以本篇範例 API 101 為主先下載它
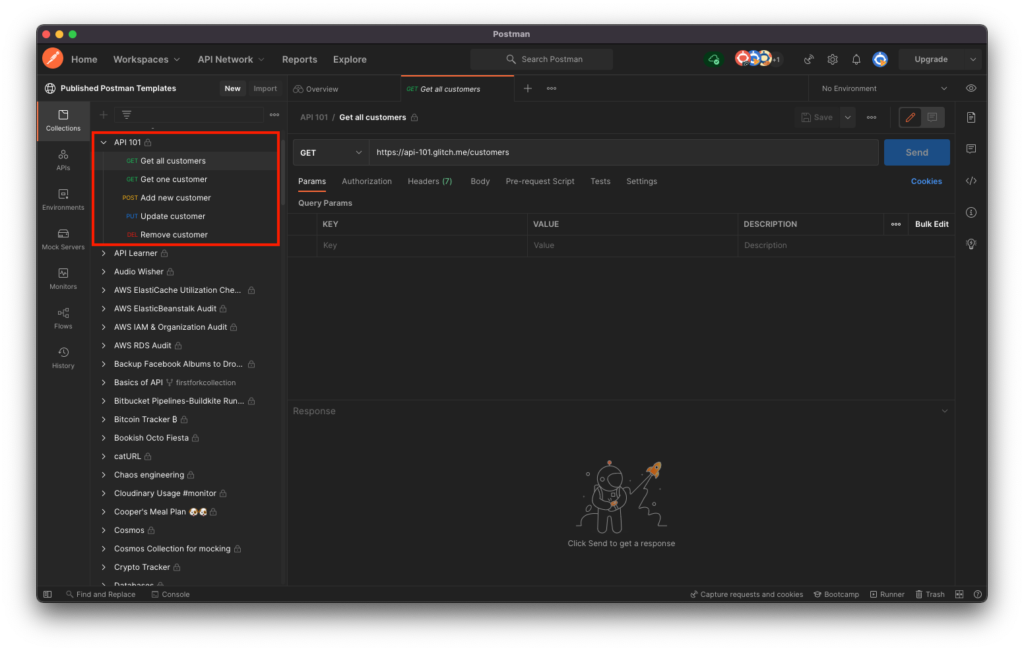
滑鼠移過去右邊會出現三個點點,點開之後下面有一個 Export 可以點選
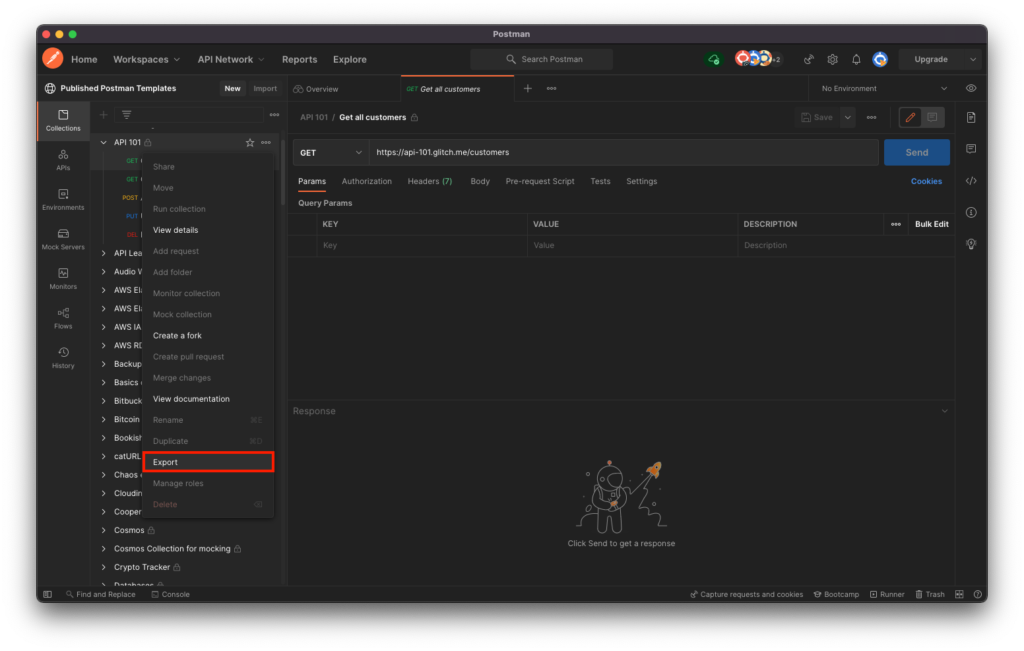
下載後會獲得一個 “API 101.postman_collection.json” 檔名的文件
使用 Postman To Swagger 轉換文件
選項一
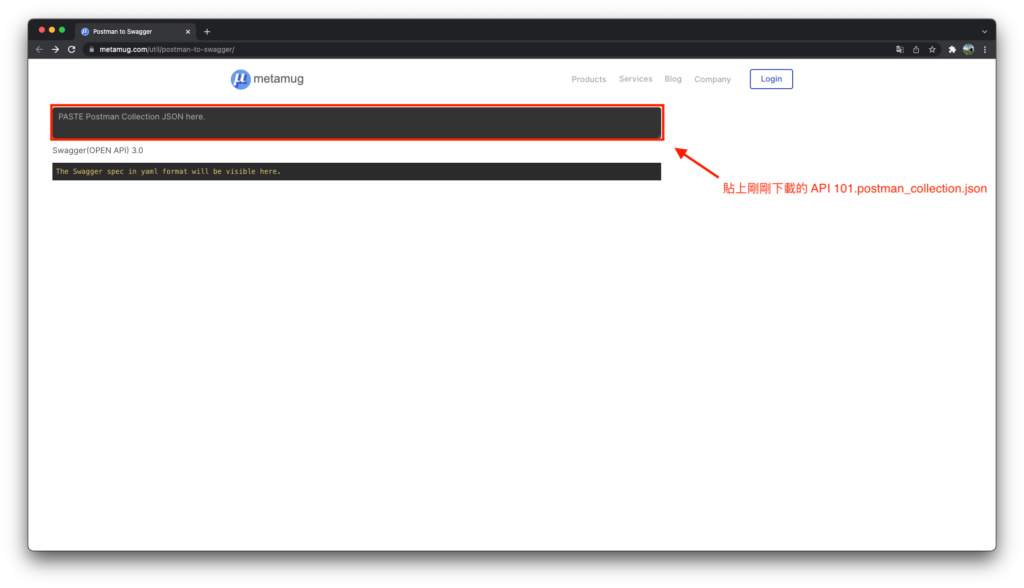
再來我們開啟一個神奇的網站它可以把 Postman 轉成 Swagger 文件格式,開啟後把剛剛下載的 “API 101.postman_collection.json” 貼到上方
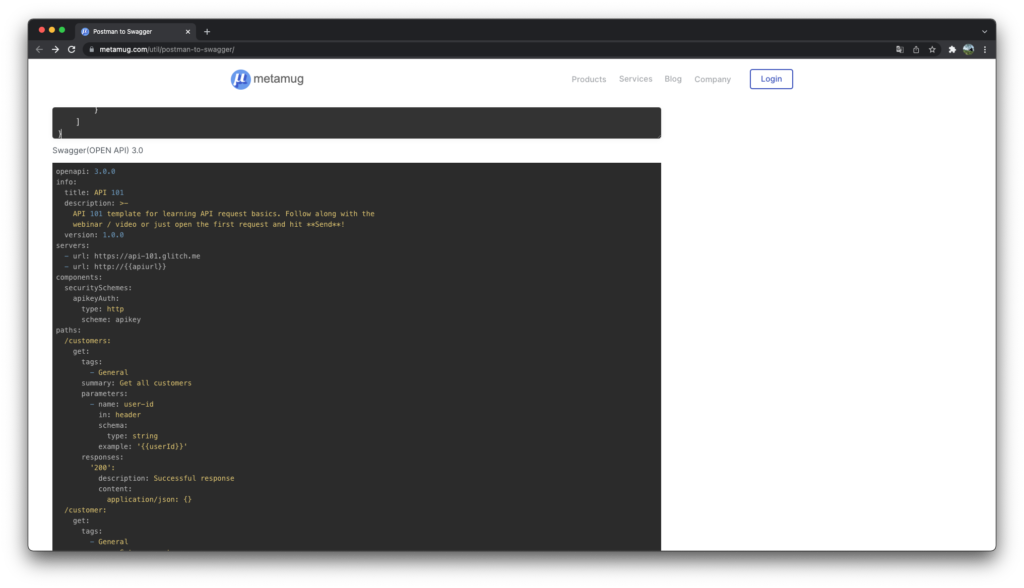
完成後下方就會跑出 Swagger 的 YAML 文件拉!
選項二
不想要開網頁想使用指令可以使用 postman-to-openapi 來完成它
$ npx postman-to-openapi API\ 101.postman_collection.json -f API\ 101.postman_collection.yaml
openapi: 3.0.0
info:
  title: API 101
  description: >-
    API 101 template for learning API request basics. Follow along with the
    webinar / video or just open the first request and hit **Send**!
  version: 1.0.0
servers:
  - url: https://api-101.glitch.me
  - url: http://{{apiurl}}
components:
  securitySchemes:
    apikeyAuth:
      type: http
      scheme: apikey
paths:
  /customers:
    get:
      tags:
        - default
      summary: Get all customers
      parameters:
        - name: user-id
          in: header
          schema:
            type: string
          example: '{{userId}}'
      responses:
        '200':
          description: Successful response
          content:
            application/json: {}
  /customer:
    get:
      tags:
        - default
      summary: Get one customer
      parameters:
        - name: user-id
          in: header
          schema:
            type: string
          example: '{{userId}}'
        - name: id
          in: query
          schema:
            type: integer
          example: '1'
      responses:
        '200':
          description: Successful response
          content:
            application/json: {}
    post:
      tags:
        - default
      summary: Add new customer
      requestBody:
        content:
          application/json:
            schema:
              type: object
              example:
                name: Dorothy Zborna
                type: Individual
      security:
        - apikeyAuth: []
      parameters:
        - name: user-id
          in: header
          schema:
            type: string
          example: '{{userId}}'
      responses:
        '200':
          description: Successful response
          content:
            application/json: {}
  /customer/{customer_id}:
    put:
      tags:
        - default
      summary: Update customer
      requestBody:
        content:
          application/json:
            schema:
              type: object
              example:
                name: Sophia Petrillo
                type: Individual
      security:
        - apikeyAuth: []
      parameters:
        - name: user-id
          in: header
          schema:
            type: string
          example: '{{userId}}'
        - name: customer_id
          in: path
          schema:
            type: integer
          required: true
          example: '1311'
      responses:
        '200':
          description: Successful response
          content:
            application/json: {}
    delete:
      tags:
        - default
      summary: Remove customer
      security:
        - apikeyAuth: []
      parameters:
        - name: user-id
          in: header
          schema:
            type: string
          example: '{{userId}}'
        - name: customer_id
          in: path
          schema:
            type: integer
          required: true
          example: '1310'
      responses:
        '200':
          description: Successful response
          content:
            application/json: {}
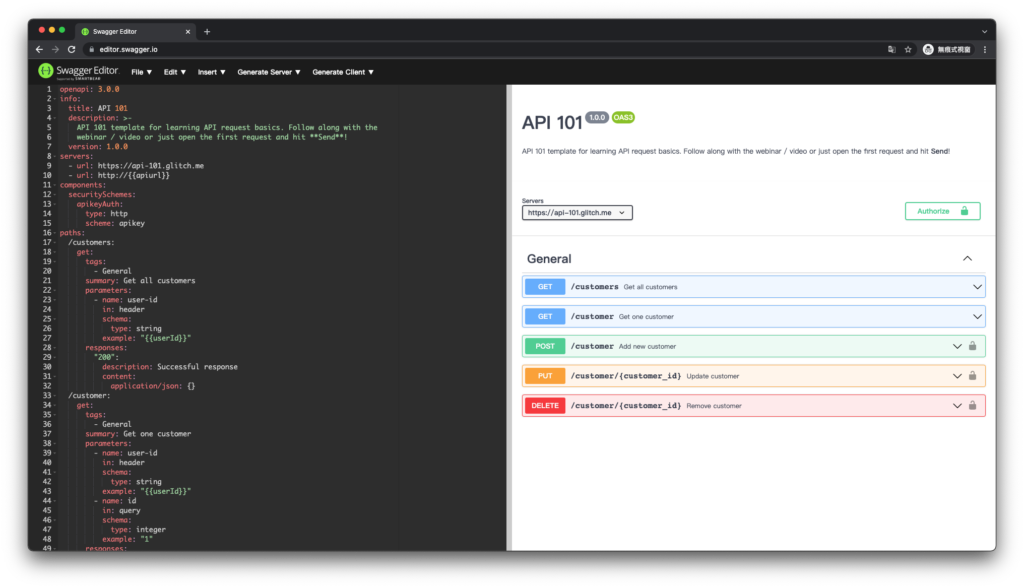
完成後使用 Swagger Editor 檢查檔案
這時候我們可以選擇使用 Swagger Editor 編輯與觀看它,不過這不是本篇最終目的本篇是要把它轉成離線可下載的文件。
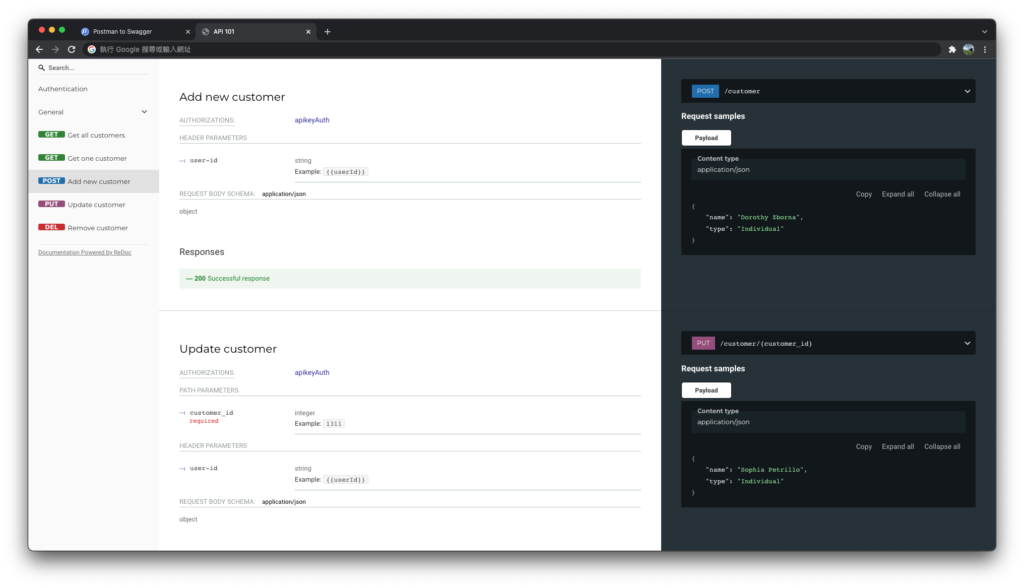
使用 Redoc CLI 轉換離線文件
最後使用 Redoc CLI 來匯出可離線觀看的 HTML 檔案,指令很簡單只要使用 npx redoc-cli bundle 就可以完成了。
$ npx redoc-cli bundle API\ 101.postman_collection.yaml
Prerendering docs

🎉 bundled successfully in: redoc-static.html (912 KiB) [⏱ 0.166s]
轉換完成就可以看到它幫我們產出美美的文件了
總結
其實做法很簡單只要使用兩條指令就可以完成了,如果不想看做法就直接使用以下吧!
$ npx postman-to-openapi API\ 101.postman_collection.json -f API\ 101.postman_collection.yaml
$ npx redoc-cli bundle API\ 101.postman_collection.yaml